BLENDER ANIMATION
Short animation visualizing how music occasionally draws our attention away from a main task at hand.
How?
Using Blender’s Layout, Modelling, Sculpting, Shading, Animating and Rigging workspaces and tools. More details below
Why?
Used as visual support for one of my thesis claims: we should have ways to reduce the salience of stimuli to facilitate mono-tasking. The color coding in the lighting (yellow for “attention deployment” and blue for “situation modification”) reflects the emotional regulation strategy at play in the proposed design (see thesis project).PROCESS
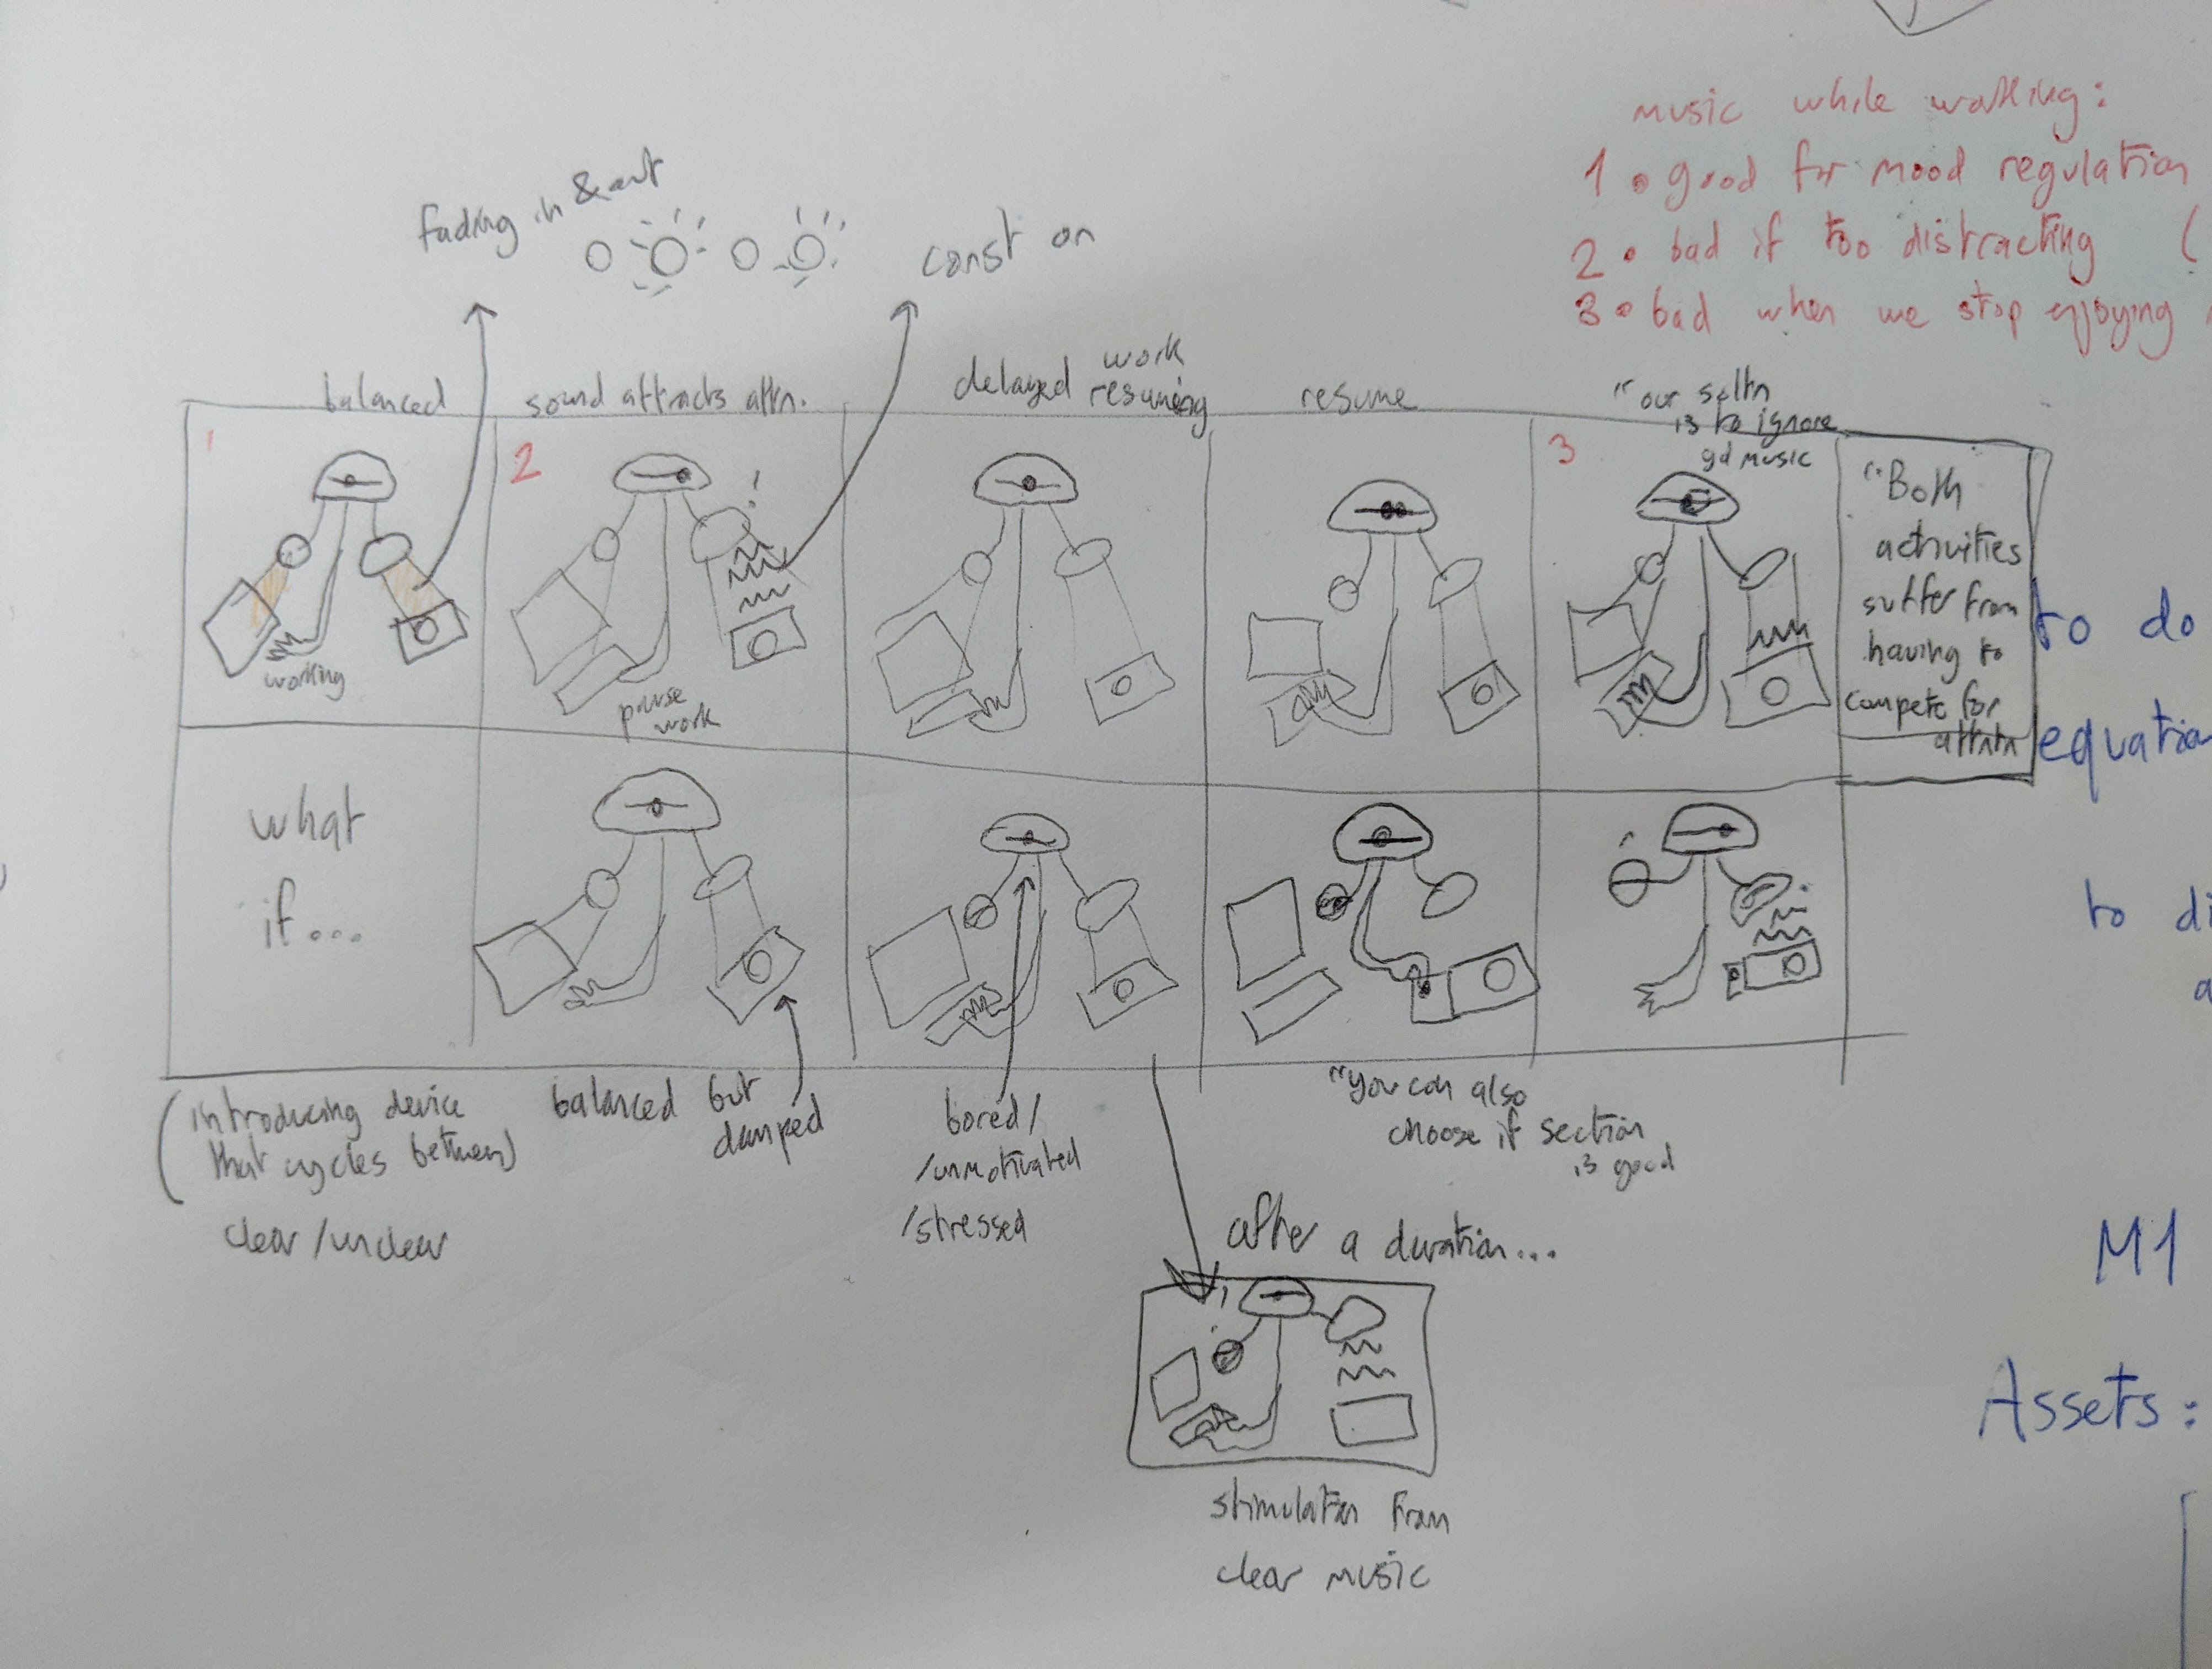
Sketch and Story Board

Step zero is defining what needs to be conveyed, before fleshing out how.
Next is a loose story-board: what might the sequence of actions/events be?
The storyboard also gives peers something tangible to discuss, making it easier to get feedback.
Layout and Organization
Jumping all the way to the end of the process: this is everything in this project, bundled into “collections” (the equivalent of groups/folders in blender).The final layout contains separate assets/groups of assets: “Computer”, “arm rig”, “SpeakerGroup”, “Nerves” and “Head”
Each collection contains the 3D objects as well as their corresponding light sources.
Some objects like the arm and the eye have rigs: a set of virtual “bones” that aid tremendously in animating.
The 3D models
The computer, keyboard, speaker and eye were created in the “Modelling” workspace where geometric transformations are relatively easy. The ear and the arm were created/altered in the “Sculpting” workspace.The ear for example, was sculpted out of a sphere.
The brain was downloaded from thingiverse and its polygon count reduced and smoothed in the Sculpting workspace.
Rigging
The two rigs created are for the arm and the eye. The arm rig allows transformations at the elbow, wrist and finger joints. The eye rig allows for movement of the top and bottom eyelid, as well as rotations of the eyeball.
The bone sticking out of the wrist provides an easy way to rotate the entire hand: itis the “parent” of the hand bones. Without it, it is not convenient for the bones in the palm and fingers to rotate as a group.
Each bone is positioned such that a rotation around x and z correspond to what the actual joints of the arms and fingers can do. This intuitive setup saves a lot of time.
Finally, the eye is simply three parts: a sphere (eyeball), two semispheres (upper and lower eyelid). To facilitate rotating them in the main file, custom shapes are used as handles to drag/rotate the elements.
Finalizing Layout + Animating
When all the assets are linked to the main scene, the camera angle and relative positions of all the elements are composed. 
Animating involves setting key-frames in the timeline. Making natural animation is a matter of tweaking timing, position and the interpolation (eg linear vs bezier curve) to match reality, or to be stylized (eg “principles of animation”)
Here is the hand:
The eye:
When changing a point of fixation, the human eye tends to move in big jumps (saccades), unless it is tracking something (smooth pursuit) ~ more here.
To make it look like this eye is reading (making a series of smaller saccades), I approximated it with a smooth movement. To make it look like the eye is moving on to the next line, sudden movements are used. When the speaker in the back pulsates (indicating a distraction), the eye also makes an abrupt change of fixation, the eyelids open up, but smoothly return to normal.
Preliminary composition before creating the table, computer, keyboard and setting up the lighting of the entire scene.
final composition after adding everything and adjusting camera angle and lighting.
Lighting of the scene has a very high impact on where the viewer looks. If the light hitting the back of the screen was any brighter for example, it would lead our eyes to the back of the screen (where details are intentionally kept at a minimum).
Since light creates or destroys contrast, many lights exist on each element to allow for fine tuning. The placement, the source (point/rectangle/cone), color and brightness are all in service of the what needs to be seen and when.